
In early August 2008 I bought a Burny Mockingbird Bass body and neck off Ebay. The seller was a right pain in the arse, with poor communication skills - I had to ask the same simple question FOUR TIMES before I got an unfriendly and aloof answer. I've never had to work so hard to give someone my money. She even had the nerve to get angry with me for the neutral feedback I left, and was even more rude via email. Still, I did not allow this unpleasantness to detract from the joy of getting a new bass and of getting a new project. But what a bitch! Rest assured that I never treat my customers like that. So go and buy some of my excellent pedals here!
Anyway, back to the matter at hand. I picked up the bass from the Post Office on the 13th August 2008. The bass came with 4 ESP tuners on. One of them was missing the backplate bit, but this doesn't stop it from working, so that's ok. However, there were no screws on the tuners. No problem - I need to order other stuff from WD Music, so I'll just get some screws too. I need some larger ones for the strap buttons, as the screws included were too thin for the holes. A quick word about WD Music - they have lots of stuff and very reasonable postage rates to Europe, and they send very quickly. I buy most of my unexciting parts (screws, misc small hardware) from them. For the cool things, like pickups etc, I still go to sellers in the USA, as the dollar is so weak AND they are cheaper, even when you factor in import fees etc. Now that I have stopped selling guitar parts I feel I can promote other guitar parts companies!
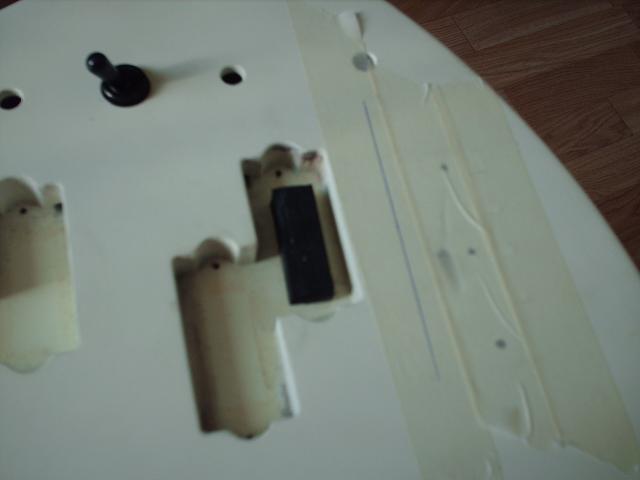
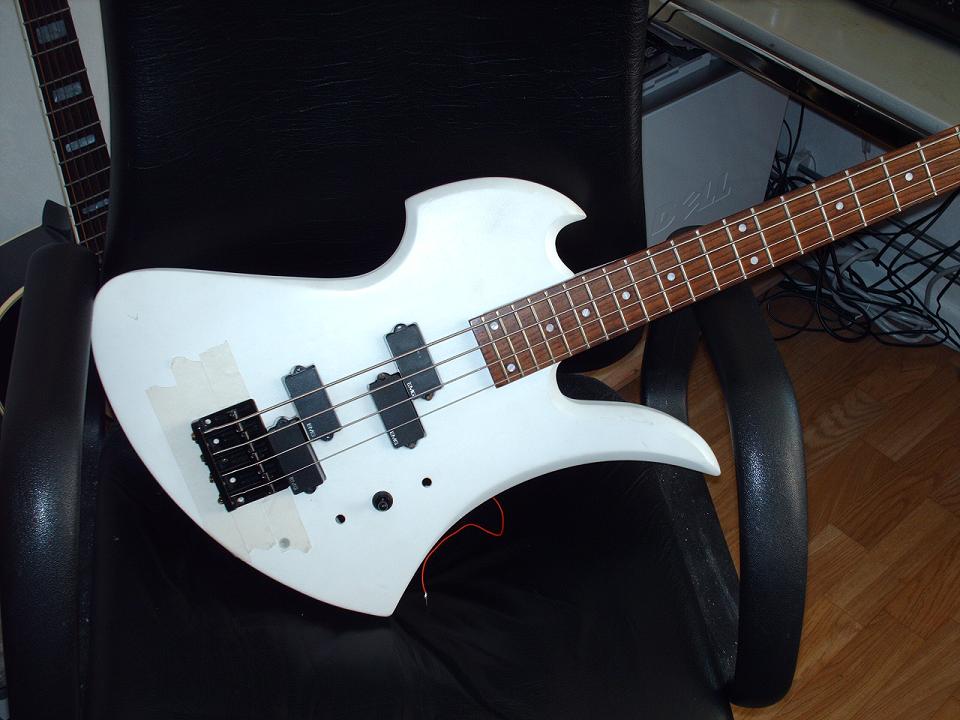
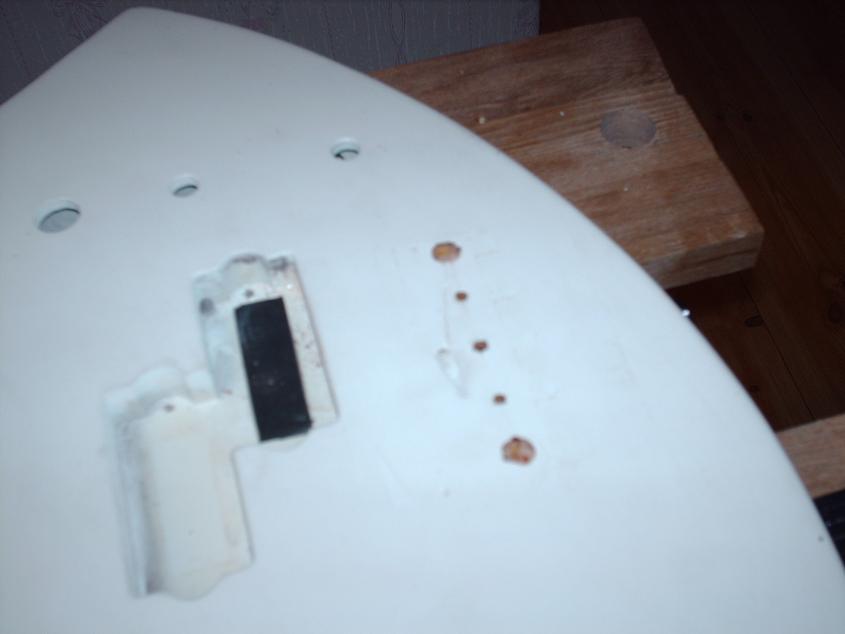
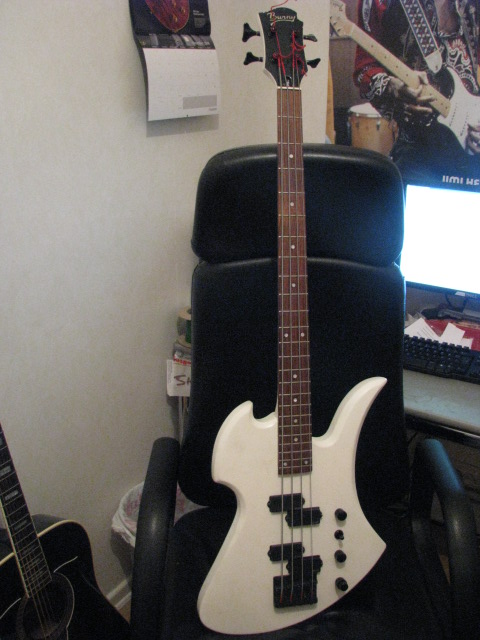
Here is a picture of the bass. I have already put a selector switch on (not wired up), just because I wanted to. That black blob is a bit of foam. It has been glued in and someone has tried to pull it out, tearing it a little. I'll leave it in for now, as it may come in handy later.
Ok, ok. I know what you're thinking. Small body, long neck - this thing is going to be very neck-heavy. Well, you would be correct! The balance is very bad right now. Hopefully it will improve when the rest of the parts have been installed.
For this project, I am going to wire in 2 EMG P pickups with their own volumes, then to the switch and on to an EMG BTC control (treble and bass) on a concentric pot.
Power will be from two 9v batteries wired in series, giving 18v. A battery compartment (you can see it on the desk in the pic above, to the right of the chair, just above the pen) will be put in the back of the bass.
Bridge will be a nice chunky black bridge, strings from the back (ie not through the body).
Parts required:
| Part | Bought from | Paid (in local currency) | Postage costs to Sweden | Condition |
| GOTOH battery compartment (18v) | WD Music, UK (link) | £13.95 | £2.00 | new |
| Screws - tuners and strap buttons | WD Music, UK | £2.00 (£1 per set) | incl with battery comp. | new |
| EMG P pickup | Music Go Round (link) | $29.99 | $15.00 (to other MGR) | Used, excellent condition |
| EMG P pickup | Music Go Round | $39.99 | $40.00 (both EMGs) | Used, excellent condition |
| EMG BTC | eBay | $49.99 | $16.99 (with insurance) | Used, excellent condition |
| Bridge | twin--cam on eBay (link) | £9.99 | £2.70 | new |
| Switch | twin--cam on eBay | £6.00 | £1.50 (to a UK address) | new |
| 2 x black knobs for volumes | twin--cam on eBay | £4.00 | incl with switch | new |
| Strap Buttons | eBay | £1.99 | £0.99 (to a UK address) | new |
| 1 x concentric knob for BTC | mmtgenterprises on eBay (link) | $9.99 | $2.99 | new |
| Output jack plate with screws | mmtgenterprises on eBay | $4.99 | incl with knob | new |
| Screws for pickups x 10 | WD Music, UK | £1.00 | £0.69 (with other bits) | new |
The output jack itself comes along with EMG pickups, so I'm hoping I'll get one included with the pickups I buy. I'm going for used pickups to keep the price down.
I'll also need to get my hands on a router so I can take out a nice chunk of wood for the battery compartment. Usually I would not alter an instrument like this, but this Burny is in pretty poor shape. It has been very badly refinished and there are a good few dents and dings on it. So why not turn it into a METAL MONSTER?
19th August 2008
The first thing on my to-do list is to put the bridge on the body. I check the distance from the nut to the middle of the 12th fret.
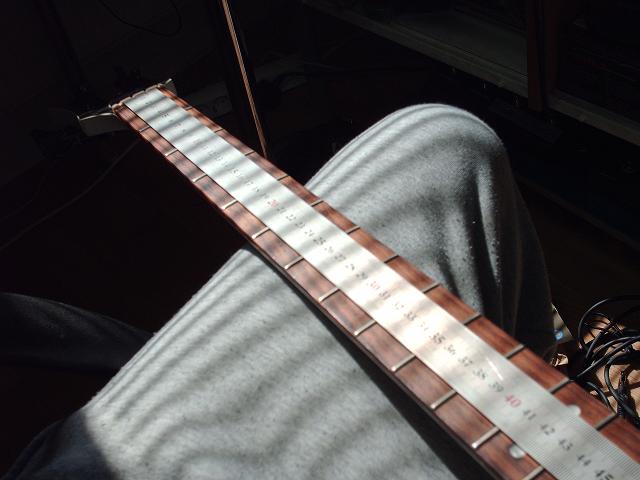
It says it is a hair over 43cm. A 34" scale bass will be 34" from nut to bridge, or 17" from nut to 12th fret. 43cm is 16.9", according to an internet conversion site (link). So this is a 34" bass, then.
Knowing this, I am going to want the strings to start 43cm from the 12th fret. I place some masking tape on the bass and draw a line 43cm from the 12th fret.
20th August 2008
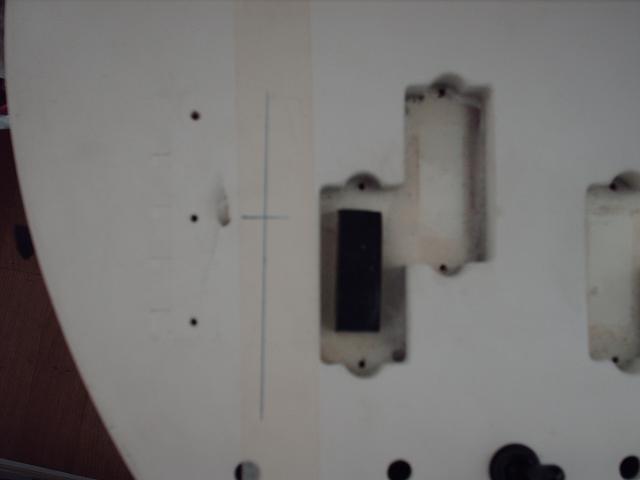
The bridge I am using has a fair bit of adjustment room on it, so that's all the measuring I really need to do. Now I need to find the centre line. The bass once had a bridge on it, but not the same one as the one I am going to put on it. The old bridge was attached using three screws, so I can use the middle one as a centre mark. A quick check shows me that this centre hole is, in fact, in the middle of the bass. I'll take another measurement to make sure, and then draw a line on the body which will act as the centre line. I'll use the neck pocket for this - the middle of that is going to be the middle of the bass. The bridge needs to be centred - I can move the saddles back and forth, but not sideways. Hence, getting the bridge centred is superduper important. If I make a mistake, I'll need to refill the holes I drill for the bridge and then redrill them in the right place. It's not the end of the world, but the woodworking tip "measure twice, cut once" applies here.
As I go to take off the neck, I notice that the old bridge has left a nice imprint on the finish of the bass. A quick check of that shows that the bridge was exactly 8cm wide. The centre hole was just a little off centre, so that's out. I measure the 4cm mark on the imprint and put a line on the masking tape, and then measure the neck width. The centre of the neck matches nicely with the centre of the old bridge. Great! I now have a centre point for the bridge.
It looks a bit off, if you ask me. I measure the length of the pickups (9.4cm, excluding the arches for the screws) and work out the middle of that. 4.7cm up from the cavity takes me to the centre line I have already drawn. But damn it, it still looks wrong.
I follow my gut on this. The new bridge takes five screws, and the middle one is without a doubt in the middle. I'm going to put in on the bass, using the middle hole which is already there. I won't put the other screws on. The bridge is too long to put it in the same holes as the old bridge (the pickup won't go in if I put it there), so I know I'll have to move it back.
Before I do this, I put a nice lot of masking tape on the bass. I want to be able to draw around the bridge when it is on; the lines can be used to help me shift it back a bit afterwards, assuming all is well. And just to prove that everything is difficult, the hole which is already there is only 2mm wide. The screws I am going to use need a hole 3mm wide. They are going to go 21mm into the body, so I get a 3mm drill bit and put some tape 20mm up from the tip of it. That way, I know when to stop when I start drilling. The extra 1mm is there for luck! It will also give the screw a bit to bite into, without it being so much that it might split the wood. The wood would certainly split if I tried to force the 3mm screw in there.
As with every time I drill, I put on goggles and tie my hair back...only to find that the battery in my cordless drill is totally flat. Time for a cup of tea.
One cup of tea later (Lipton Earl Grey, by the way), I pull out the battery. I'm only drilling one hole, so I don't need it to be fully charged up. Goggles on, hair tied back...I go for it.
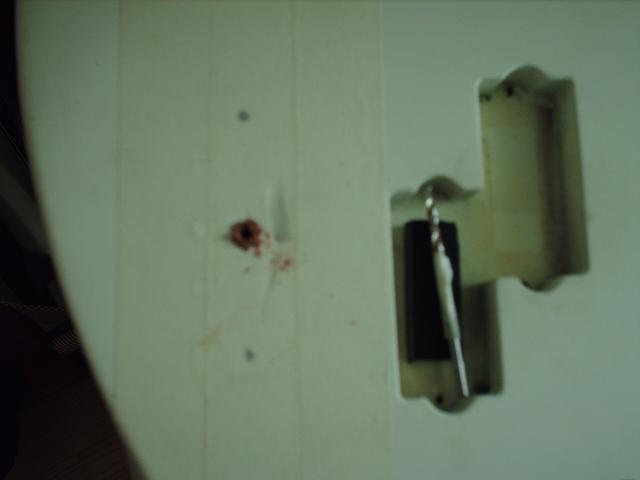
As you can see from this frightfully bad photo, the wood looks rather red. I had thought that it would be basswood or something like that, but it is most likely a derivative of mahogany, like agathis or nato. It could even be mahogany, but I doubt that. In the pickup cavity you can see the drill bit with the tape on it.
With the bridge on, I can see that it does not actually go over the pickup cavity, but it is very close. I might even be able to keep the bridge where it is! If the EMGs do not fit (it's a possibility - I don't have them yet), I'll need to make some further adjustments. But right now I am checking the positioning of the bridge, so I need to dig out some old strings to see if it all lines up. Luckily, I have an old set hanging around which I have kept just for this purpose.
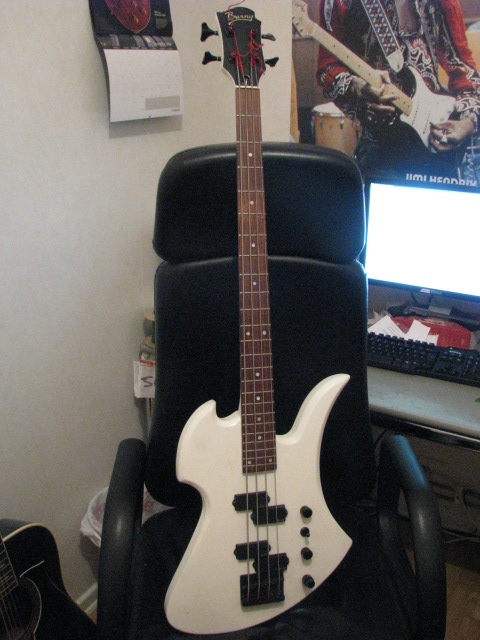
While putting the strings on, I notice that the D string tuner is broken. This is not the one with the missing backplate thing. The thing is sealed, so I will need to open it somehow to see if I can even rescue this tuner. Damn it. Tuners aren't free, and I had not planned on swapping them. Ho hum. These things happen, I suppose. Here is a picture of the bass with the strings on:
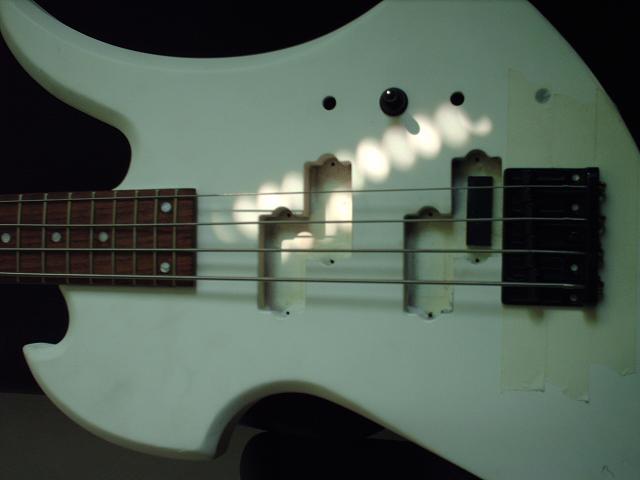
The positioning looks good. The bridge stays where it is!
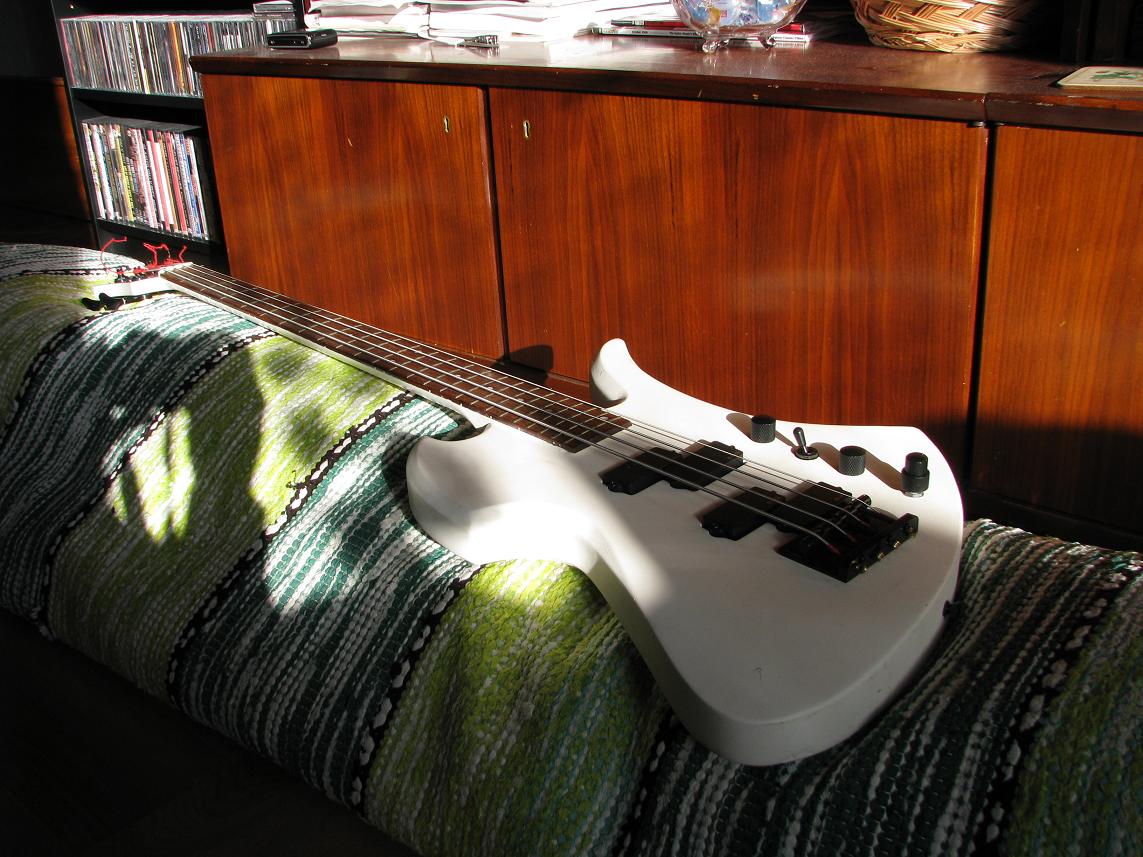
Here is an arty picture.
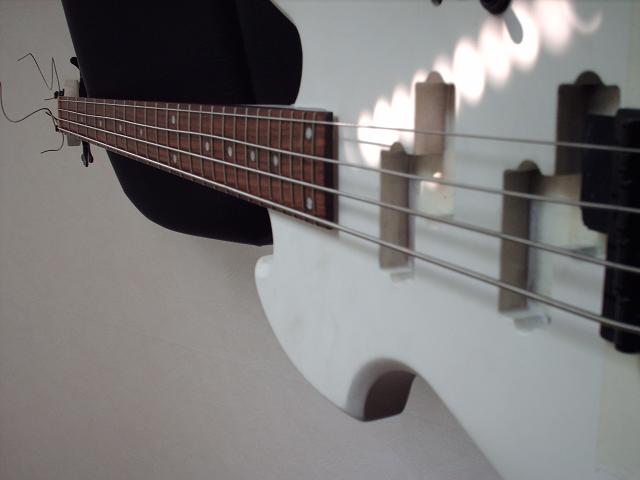
The neck is very wide - it's 42mm at the nut, with a good bit of space either side of the E and G strings. Perhaps a bit further down the line I'll put a different nut on it to spread out the strings a bit more. Or not. I don't think it will bother me, to be honest. I could get a bridge with a wider string spacing, of course, but it won't change the fact that the nut has been cut a bit oddly. Besides, I chose this bridge because the 19mm string spacing matches my Fender Jazz Special, which is a sheer joy to play.
What's left to do now?
I'll take a look at that tuner, then.
22nd August 2008
That was easy. I took the tuner off the bass and accidentally dropped it. The backplate thing popped off, and I could get to the internal mechanism of the tuner and tighten things up in there. Hurrah!
I put the strings on properly, and found that there is zero or perhaps negative relief in the neck (ie no bow at all - the strings are flat against the frets). I take off the trussrod cover, only to find that the adjustment thing needs a 5mm allen key. No problem, I have one. But it won't fit in the tiny - tiny! - gap left for one. Like an idiot, I squish my allen key in there and turn it anti-clockwise, and thankfully I don't ruin anything. I tighten the strings and PING!!!!!! the tuner for the G string breaks so it is as good as the D string tuner was before I fixed it. It looks like these tuners took a serious beating somewhere along the line. I'll need to take that one off and tighten screws etc. I hope that these tuners are ok.
23rd August 2008
I fixed the tuner. The backplate had popped off when it broke, so I just tightened up the screw in there.
Now that the bass has been left overnight, I expected the neck to have bowed a little. There is, however, still practically no relief in it and there is a lot of rattle and buzz. I'll try and put some more relief in it later on today. I may need to shim the neck to raise string height - the saddles are already quite high, and the action is still a little too low. We'll see. I am still waiting for the electronics to arrive, so nothing much is happening right now.
The bass itself has a good sound, though: lots of low end, and a rather moody growl to it. Nice! However, as there are no pickups on it, it is very hard to play as there is nowhere to rest my thumb. I try resting it where the top of the neck pickup is going to be, and the positioning seems a little odd. Perhaps it will feel more natural when I get the pickups in? Or play it standing up? It may be that - Heaven forbid! - this bass would be best played with a plectrum.
26th August 2008
A few more parts have arrived - the jack plate and concentric knob arrived yesterday, and the EMG BTC arrived today. The EMG P pickup I've been waiting for is not going to arrive - there was a mistake somewhere down the line, and the pickup they have is not an EMG. However, I have made some good headway with another source, and I may be able to sort out both pickups through them. The pickups (and their pots) are now the only parts I still need.
14th September 2008
Right - I got the EMGs sorted. They are both being sent from the US, but from two different Music Go Round stores. The first store is sending it to the second, which will then send both to me. It's still going to cost me WAY more postage than it should, but never mind. The two pickups are (supposedly) in great condition and would cost at least twice as much here, and they come with pots and capacitors. Thank God for the weak dollar! It has all taken far too long, though. I had initially expected the whole bass to be finished by now!
24th September 2008
The EMGs are here!!! They are both in excellent cosmetic condition. They also came with pots, battery clips, output jacks and three (out of 8) screws. Now, all I need is some time to get them installed and checked. Roll on the weekend!
28th September 2008
Time for some installation. There are a lot of things to do. Do I wire up the pickups now to see if I like the sound? If so, then I'll need to desolder everything to finish off the construction bit. I think that I am going to go with the 18v system, so I may as well put in the battery box now, and then wire up everything. So, with that decided, I need to:
1. Install the battery box.
2. Widen the hole for the BTC control, as the current hole (for a standard tone pot) is too small.
3. Finish putting on the bridge. I need to fill two holes and drill four. The EMG fits the hole and even leaves a bit of space, so the bridge can go on without any trouble.
4. Put on the jack plate. I'll need to fill all four current holes and drill four more.
5. Wire it all up.
6. Set up.
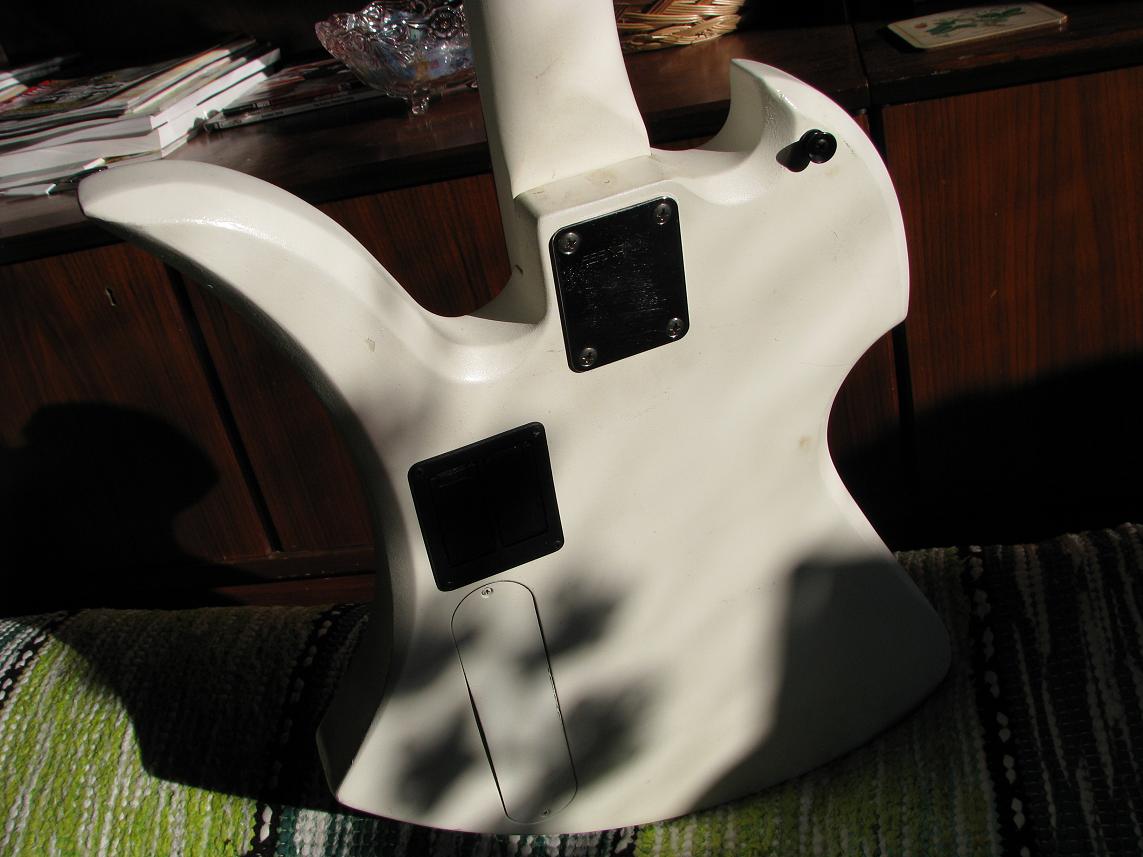
First things first: here is a picture of the bass with the EMGs on.
Mmmmm, metal. I love the sound EMGs make, so this bass is going to be a real monster. I do confess that I am slightly worried about the controls. Would a blend and master volume work better? Ach, never mind. I'm going for two volumes, as the pre-existing layout dictates. Besides, what the hell would I do with the switch?
Anyway, time to deal with the battery box. I am going to put it by the control cavity, under the neck pocket. I would have preferred to put it in the top area, above the bridge, but the body is a little too thin there. By the neck is the thickest part, so the body should be strong enough to take it there.
Here's the deal: I need to make a hole 57.5 x 49.5mm large and 33mm deep (according to the instructions that came from Gotoh). That's a large hole. Time to take the bass apart, get out the masking tape and start drawing! When that is done, I'll start drilling holes in the body and eventually these holes will meet up. In short, like a router, but a lot more work. I don't have a router, nor a template for this box, so this seems to be the best idea. Right now, at least!
Masking tape on, area for the FULL box marked out:
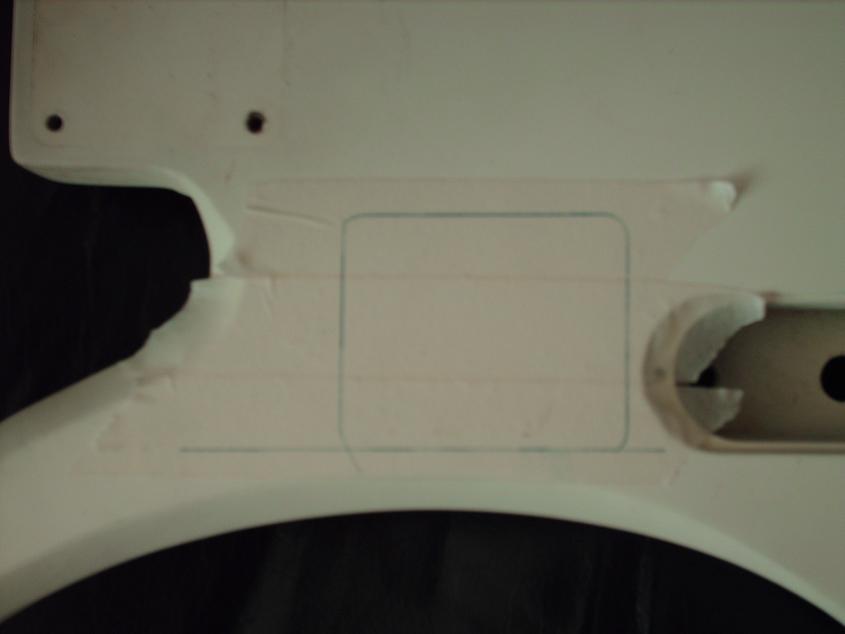
I made the bottom bit of the box be in line with the bottom of the control cavity so it will look more neat.
And with the inner box (what needs to be routed out) marked:
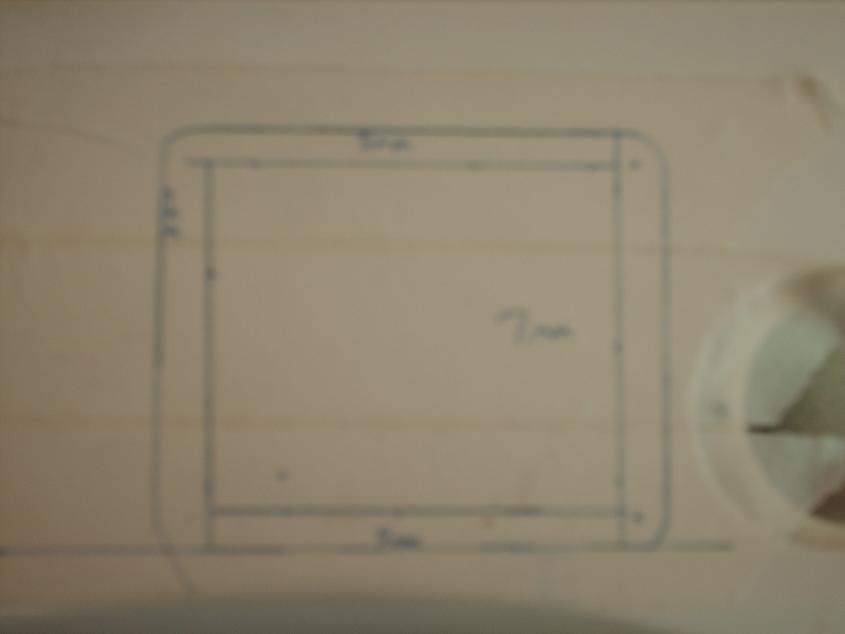
Sorry for the quality...the measurements are 7mm from the sides, 5mm from the top and bottom.This should make the cavity JUST too small for the box. I subscribe to the idea that it is easier to take wood away than put it back!
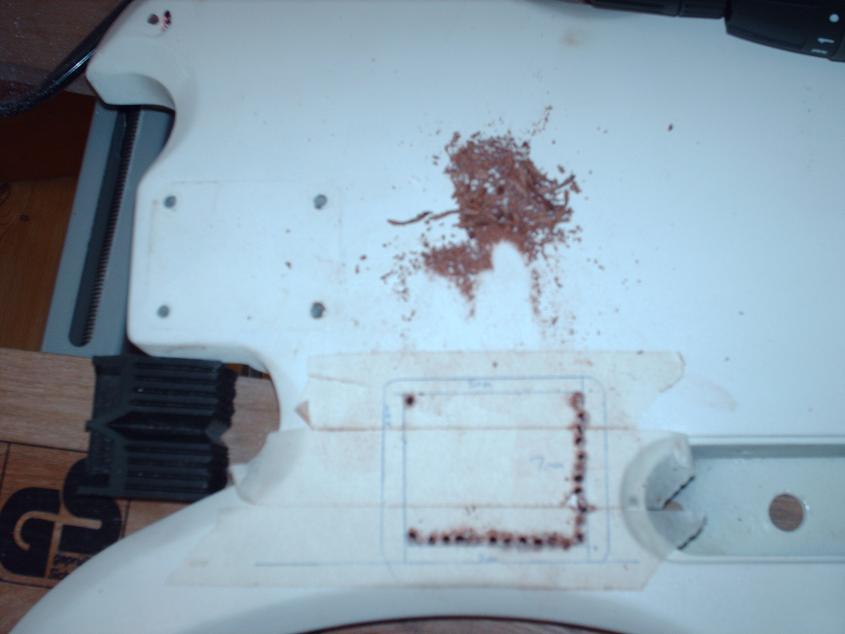
Here it is with some of the holes drilled:
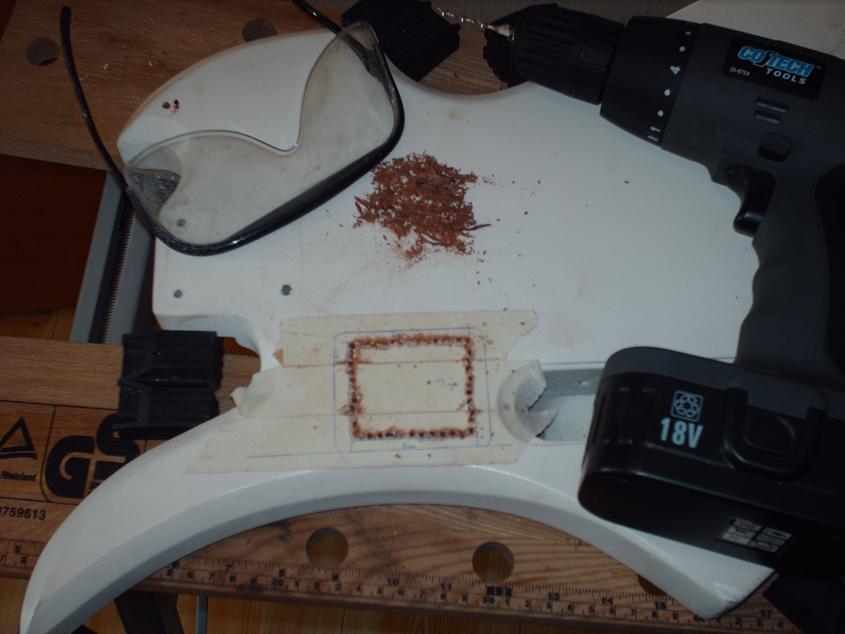
And some more...
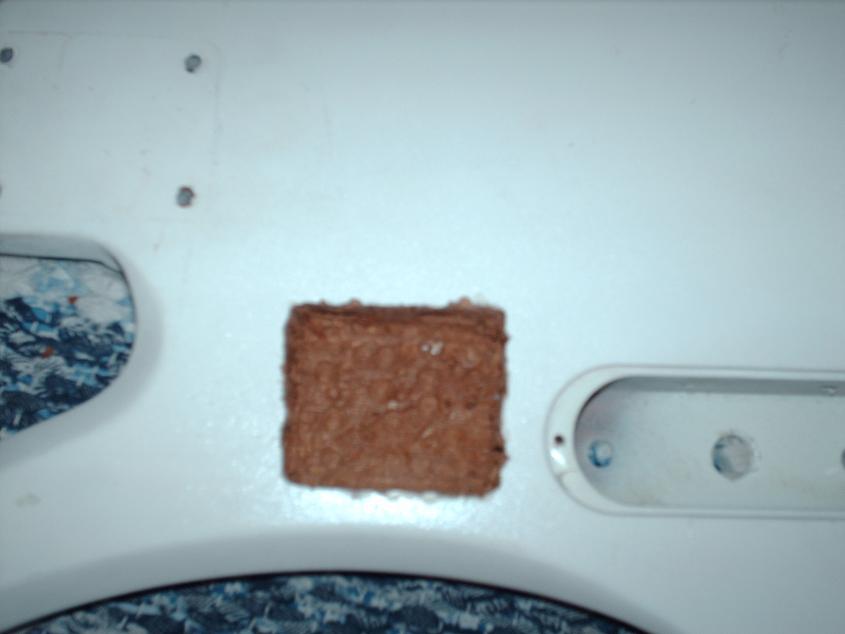
I drilled holes in the middle, and then started hacking away with a chisel. The box will now go in, but I need to sort out the depth of the hole. Smoothing the sides would probably help a lot too.
That's all for today. I'm tired, and my back hurts from leaning over the body so long!
29th September 2008
The battery compartment finally fits in. It took a bit more time with a hammer, chisel and some Black Label Society on the stereo. I also drilled a hole from the control cavity to the battery cavity, so the wires can get in. It is now screwed in and everything looks great. I'm already having trouble getting the battery bits out, though. Not a very good design, it seems!
Done with that, I drilled out and filled (with 6mm dowels) the outer two holes for the bridge, then drilled the inner two holes. I'll wait until tomorrow for the glue to dry before I drill the outer holes.
I also widened the hole for the BTC control. I decided against filling the four holes for the output jack plate, as it seemed like a bit of a bother. I drilled one hole, then screwed it on and drilled the other three. It's ok and worked with no problems when I tried it with a cable. I also had to widen the hole for the jack, as it was too small. I used a conical drilling thingie.
What's left to do?
1. Sand down the dowels in the outer two holes for the bridge screws.
2. Drill the holes and put the bridge on.
3. Wire up the electronics (I ordered some screws for the pickups - they should be here soon. I love WD Music!).
4. Put the neck back on.
5. Set up.
I couldn't wait. The glue was dry. I sanded the dowels and drilled the remaining two holes for the bridge. It is now on.
But that will do. I'll finish off everything tomorrow.
30th September 2008
Hmm. The colour under the white paint looks nice. It's a kind of vintage-white affair, a bit like my '77 Ibanez. The white paint on there now has been very poorly applied, with "orange peel" effect everywhere...no, I'll leave it as it is. I don't really have time to start stripping paint right now. However, I reserve the right to change the electronics to a blend + master volume. I could leave the switch there, and use it as a kill-switch (which I would probably never use) or just leave it there, not wired up to anything. The hole for the switch is too wide for a pot without putting in a collar of some sort.
(Later)
Done. I wired it all up (using this wiring scheme, but with a three-way switch). It took about an hour longer than I thought it would. I don't have the screws yet (I only ordered them a day or two back), so I can't finish it properly.
Annoying bits:
1. The knobs don't fit on the pots. I'll need some knobs which will fit a smooth shaft.
2. The BTC control sticks out a bit. I'll need to get another nut to help lower it.
3. So neck heavy!!!
Great bits:
1. It sounds brilliant. The bass has a real throaty growl to it. Very metal.
I'll put up a photo when the screws are here and I have some new knobs. Otherwise, this photoessay thing is done!
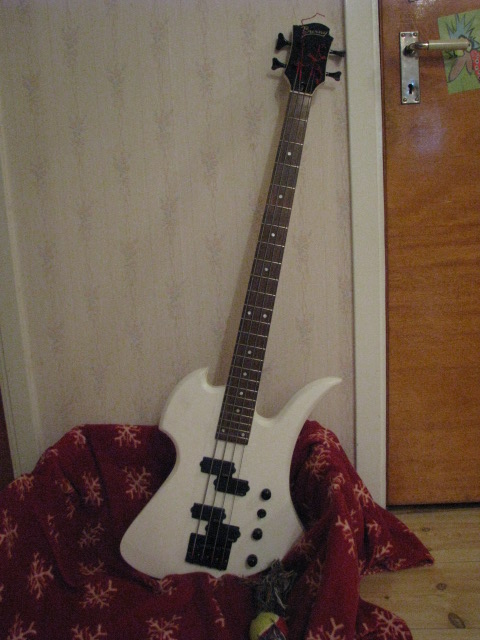
Finished bass:

19th October 2008
This story doesn't have a happy ending. I can't get on with the shape...it's for sale. 2500kr, if you want it!!! Bargain!!! (Now sold)
Rambo did NOT like having his bed used as a photo prop!

More pics:

10th January 2009
Sold to Johan in Hässelby!